 Vellum Help
Using Vellum on Windows
Vellum is Mac-only software, but it is possible to use it by renting a Mac “in the cloud” that you can access via your PC.
This guide will walk you through using a service called MacinCloud. Currently, this service offers plans as low as $1 USD per hour. And once you are familiar with Vellum, creating your final files should take considerably less than an hour!
Vellum is unaffiliated with MacinCloud. If you have questions about this service, you can find answers to commonly-asked questions on their Support Page.
- Sign Up for MacinCloud
- Log In to Your Cloud-Based Mac
- Starting Vellum
- Transferring Files
- Importing a Word Manuscript
- Purchasing a Vellum License
- FAQ
Sign Up for MacinCloud
To use MacinCloud, you will need to purchase a plan. Their Pay-As-You-Go (PAYG) tier should be sufficient for most, though you can view the available plans on their Pricing Page.
Press the Sign Up button for the plan you’d like to purchase:

MacinCloud allows you to choose the location of the Mac you are renting. Choose the location nearest to you.
You will also need to choose the Operating System and Platform you’d like to use. Vellum requires macOS Catalina, or newer.
Recommended configuration for hourly (PAYG) configuration:
- macOS Catalina
- Mac Mini Classic
Recommended configuration for Monthly configuration:
- macOS Monterey
- Mac Mini Silicon M1
Once you’ve selected your desired options, press Next to enter in your personal details and purchase.
Log In to Your Cloud-Based Mac
After you purchase a MacinCloud plan, you will receive an email with your MacinCloud login information. That email will contain a link to a zip archive of MacinCloud Connection Files.
Once you’ve downloaded and unzipped that archive, you should see various Microsoft Remove Desktop configuration files:
- MacinCloud_Popup_800x600.rdp
- MacinCloud_Popup_1024x768.rdp
- MacinCloud_Popup_1280x720.rdp
- …and so on
The numbers in each filename – e.g. 1280x720 represent the resolution of the window you will be opening. Choose the largest size that you can comfortably open on your PC, and double-click the corresponding filename. Microsoft Remote Desktop will attempt to connect to your virtual Mac and display a log-in screen:
Enter in the username and password that MacinCloud sent to you via email. Authenticating and initializing may take a while, but eventually you’ll see your remote Mac’s Desktop.
Starting Vellum
Vellum is pre-installed on most MacinCloud computers. To start Vellum, look for the Vellum application icon – a flower on a purple background – in the Dock at the bottom of the window:
To launch Vellum – or any Mac application – from the Dock, click on it.
If you don’t see the icon in the Dock, you can locate it using the Finder. The macOS Finder is the equivalent of the Windows Explorer (or File Explorer) on a PC. To use the Finder to launch Vellum:
- Open a Finder window by clicking on the leftmost Dock icon (the face)
- Click on the Applications folder in the Finder window sidebar
- Scroll down to find the Vellum icon
- Double-click the Vellum icon
If you are unable to locate Vellum on your remote Mac, you may need to submit a support ticket requesting MacinCloud to install it.
Once you’ve launched Vellum, you should see its Startup Window:
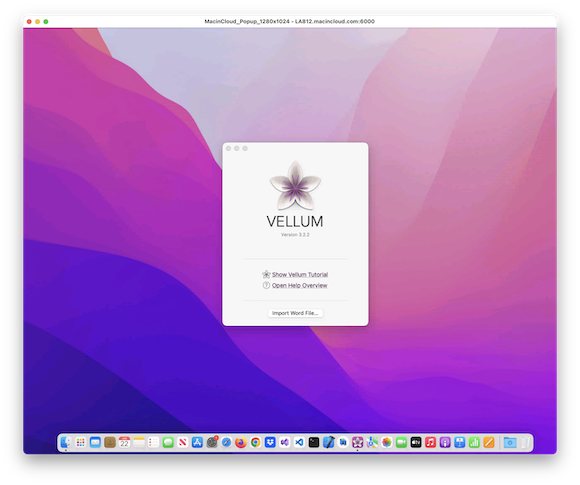
To familiarize yourself with Vellum, we recommend going through our brief Tutorial first. Clicking on Show Vellum Tutorial in the Startup Window will open it in Safari on your remote Mac.
Transferring Files
As you use your remote Mac, you will need to transfer files to and from your PC. The easiest way to do this is to use a cloud-storage service, like Dropbox, OneDrive, or Google Drive.
Whichever service you choose, you will want to make sure that it is installed on both your PC and your remote Mac. Then, whenever you add a file to the cloud-syncing folder on your PC, it will be downloaded automatically to your remote Mac (and vice versa).
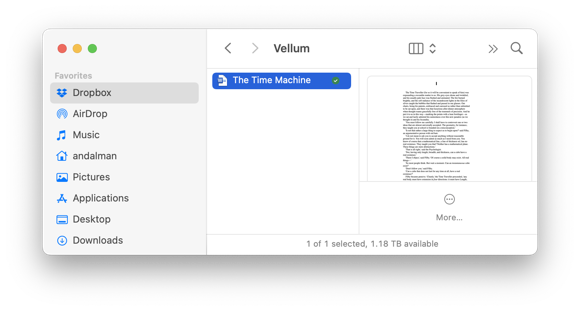
The first file you’ll need to transfer is the Word manuscript you want to import into Vellum. On your PC, move your manuscript’s .docx file into your cloud-syncing folder. Then, when you return to your remote Mac, you should find that it has been downloaded to the cloud-syncing folder there:
Importing a Word Manuscript
Once you’ve transferred your manuscript, you can import it by pressing the Import Word File button in Vellum’s Startup Window, and selecting your .docx.
When you import a manuscript, Vellum will analyze its content to detect chapters and other formatting. You can find a detailed description of this process – including “best practices” for structuring your manuscript – on our Importing Your Manuscript help page.
Importing will automatically create a new Vellum file. And even though Vellum will auto-save your document, it’s always a good idea to save your work sooner rather than later. The first time you use Vellum’s File ▸ Save command, you can choose the filename and location for your Vellum file on your remote Mac.
We recommend saving your Vellum files to your cloud-syncing folder as well. That way, if your MacinCloud account lapses, you’ll always have a backup on your PC.
Purchasing a Vellum License
Though Vellum comes pre-installed on Macincloud servers, it will not have a license required for generating the files you need to publish your book.
When you are happy with how your book looks and are ready to generate, you can purchase a license from within Vellum by pressing the Purchase button in the upper-right corner of your Vellum window.Once you’ve purchased a license, you can generate ebook and print edition files that are suitable for uploading to online stores.
FAQ
- Where is the Command (⌘) key?
-
Mac keyboards have a Command key that has the symbol ⌘. You will often see this symbol in Vellum’s main menu, which appears at the top of the remote Mac window when you’re working in Vellum. For instance, you’ll see ⌘S listed as a hotkey next to File ▸ Save.
If you are using a a Windows keyboard, the Windows logo key serves as the Command key.
- Why can’t I update Vellum?
-
MacinCloud administrators are responsible for updating to the latest version of Vellum. Usually, they are on top of installing new Vellum releases. If you find that your version is a little out-of-date, you can submit a support ticket asking them to install the latest one.
- If I get a Mac in the future, do I have to re-purchase a license?
-
No! To install your license on a new Mac, you can submit a Restore request.