 Vellum Help
Vellum Tutorial
In this tutorial you will use Vellum to create a great-looking book. You will start with a prepared manuscript and finish ready to generate files for each major book platform and for print. We’ve provided starting materials and will guide you through each step. By the end, you should have an understanding of Vellum and how it can be used to easily create beautiful books.
- Download Vellum
- Download Sample Material
- Import the Manuscript
- Browse Your Book
- Save the Vellum File
- Choose a Style
- Add Front and Back Matter
- Add a Cover Image
- Preview Your Print Edition
- What’s Next
Download Vellum
If you haven’t already done so, download and install Vellum.
This is the full version of Vellum, which you will use to run through this Tutorial. You can also use it to format your own manuscript. A purchase is only necessary when you are ready to generate your books.
Download Sample Material
You’ll be creating a book from the classic H. G. Wells novella, The Invisible Man. We’ve prepared a Microsoft Word version of the text and an image to use for the ebook cover. Click the link below to download these sample materials:
The downloaded package should appear in your Downloads folder. Find the downloaded folder, which you’ll need for the next step.
Import the Manuscript
To import the text from The Invisible Man into Vellum, first start Vellum:

- In the Startup Window, press Import Word File…
- Locate The Invisible Man.docx in the Vellum Sample Documents folder
- Press Import
Vellum will open the Word document, analyze it to find title information and chapters, and then convert it into Vellum’s native format.
Note: Before importing your own manuscript, we suggest reading Importing Your Manuscript for tips about how best to format for Vellum.
Browse Your Book
After successfully importing the manuscript, you should see the book in Vellum.
Vellum divides your book into chapters, which are listed in the Navigator.
Click through the chapters in the Navigator. When you select a chapter in the Navigator, its content is shown in the Text Editor.
Save the Vellum File
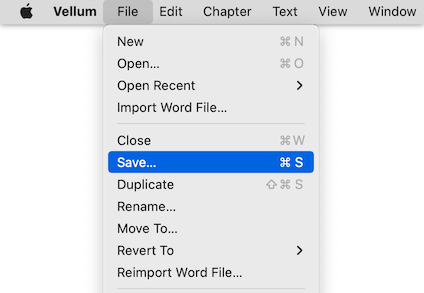
Even though Vellum will auto-save your document, it’s good to get into the habit of saving your changes. Use Vellum’s File ▸ Save menu item to create your first Vellum file.
Whenever you use Save, Vellum will save the changes you’ve made to your book’s content, as well as the style choices you have made.
Choose a Style
With the contents of your book in place, you’ll now take a look at Styles and see how Vellum combines quality typography and custom fonts and flourishes to create an attractive book.
To access the Styles Pane, click the Styles icon in the Contents / Styles selector shown in the toolbar:
You should now see a set of styles that can be applied to your book. Browse these styles by scrolling up and down in the middle pane, each one displaying what your ebook will look like with this style applied.
Clicking on a style will select it, applying the style immediately to your entire book. When you select a style, you will also see a representation of a page spread in your print edition.
Style Categories
Currently, you are only browsing Popular styles. To help you find the right style for your book, you can use Style Categories on the left:
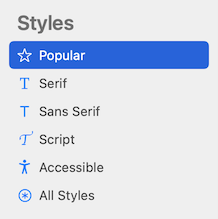
You can select a Category like Serif or Script to narrow down the style choices that appear in the browser in the middle pane. To see every style available, choose All Styles.
You can experiment with styles as you are writing, or come back and change your mind after you’ve proofed your book. You can even configure certain aspects of your Style and save those customizations for use in other books! More information about Styles can be found in Applying Styles to Your Book.
Extra Credit
Choose an appropriate style for your post-apocalyptic cozy mystery. Really personalize it by configuring its Heading and other style features, like Ornamental Break.
Add Front and Back Matter
The manuscript for The Invisible Man contains only the content of the novel. However, a finished book should include front and back matter as well. Next, you will add a Copyright and About the Author page.
First, switch the Navigator to Contents. Use the Chapter menu to add a Copyright and About the Author element.
You can add a variety of elements using this menu. Want to add several at once? Use Add Multiple Elements instead.
Extra Credit
Edit the text of the About the Author page to add a short biography of H. G. Wells. Be sure to include a link to his Instagram!
Add a Cover Image
Next, we’ll assign an image to use for the cover of your ebooks. To add a cover:
- Select the book title — The Invisible Man — from the Contents Navigator. This will show you the title and author information for the book.
- Click on the Ebook Cover tab to inspect the cover.
- Click on the plus that appears when your mouse is over the cover, hen select the image file that you downloaded above:
Vellum assigns the cover image to your book and shows you if it satisfies size criteria for ebook stores. In this case, you will see that the image is large enough for all book platforms. More details can be found in Ebook Cover Image.
Extra Credit
In the Preview, you’ll see how the cover image will be presented to your reader. Switch to an eInk device (like Kindle Paperwhite) to see how the cover image will appear on an eInk screen.
Preview your Print Edition
As you’ve worked with your manuscript, you’ve seen a preview of the ebook edition of your book. Want to see your book in print? You can change what’s shown in the Preview using the Device popup:
Use the page turn buttons to advance through a chapter. You can learn more about settings for your paperback or hardcover in Your Print Edition.
Congratulations
You’ve finished the tutorial. If your name is H. G. Wells, you are poised to become a self-publishing sensation!
What’s Next
When you’re happy with how your book looks, the only remaining steps are to generate your books, and upload them to online retailers.
Book generation requires the purchase of a Vellum package. When you are ready to buy, press the Purchase button in Vellum’s toolbar.
If you have any questions, please see our Purchasing FAQ, which answers the most common ones.
Enjoy using Vellum!