 Vellum Help
Using Amazon Attribution Links
Amazon Attribution allows authors to track how well the links to their books perform: how often readers click on them and, more importantly, how often they purchase.
Though originally designed for advertising, Amazon Attribution links can also be used in your books to measure how many readers click to purchase more from your catalog.
- Signing Into Amazon Ads
- Creating a Campaign
- Creating Ad Groups
- Including Attribution Links in your Book
- Tracking Clicks and Purchases
- Reusing Links
Signing Into Amazon Ads
Since Amazon Attribution Links were designed with advertising in mind, managing them requires you to log into your advertising account at advertising.amazon.com.
If you haven’t used Amazon advertising you’ll need to Create an account first.
Once you’ve signed in, you’ll see the Advertising Console, which contains all of the features you need to create your Attribution Link.
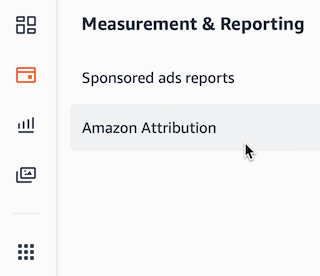
To access the Amazon Attribution functionality, click on the Measurement & Reporting icon on the left, and then select Amazon Attribution button from the drawer that slides out.

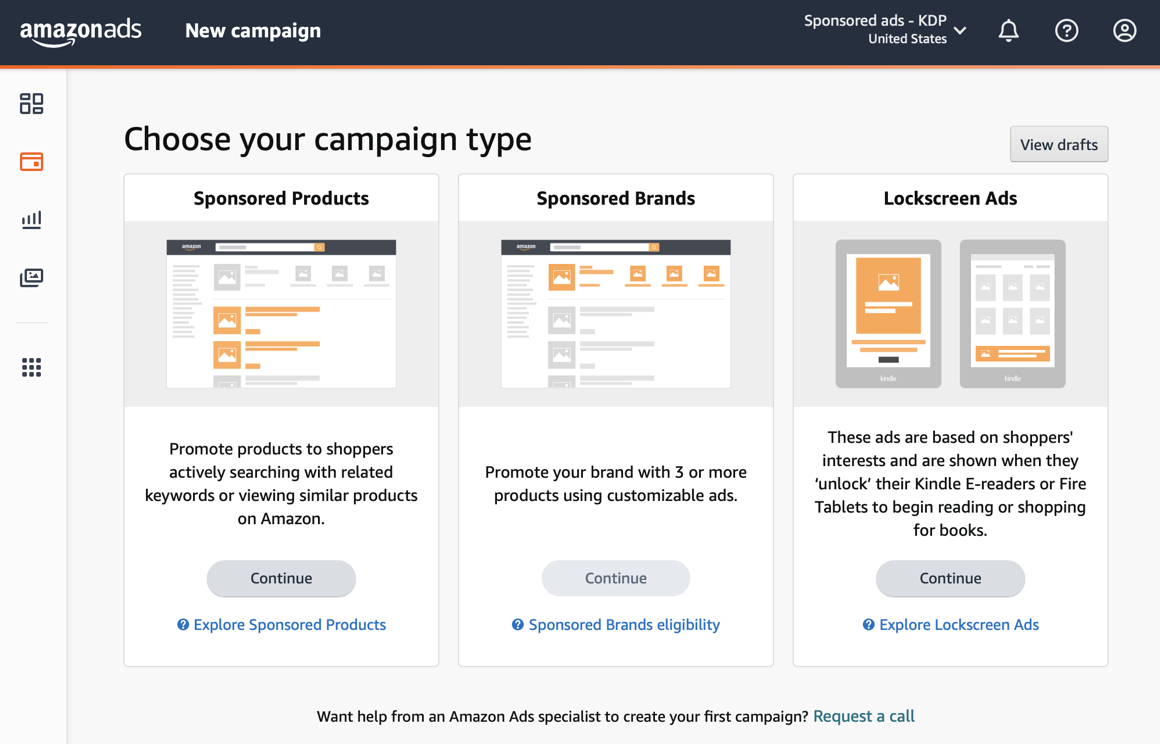
Creating a Campaign
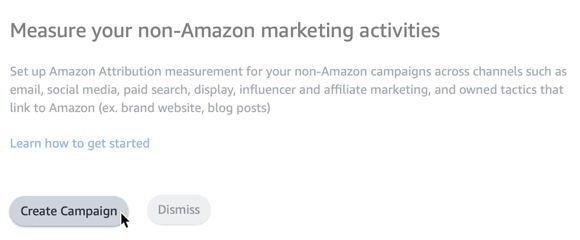
Before you can create any Attribution Links, you will need to create a campaign. Campaigns allow you to classify traffic from different sources (like Facebook ads, your website, etc.). Here, we’ll create a campaign to measure sales driven by links in your books.
Press the Create Campaign button to start the process.
Choose the Create manually option, and then give your campaign a name:
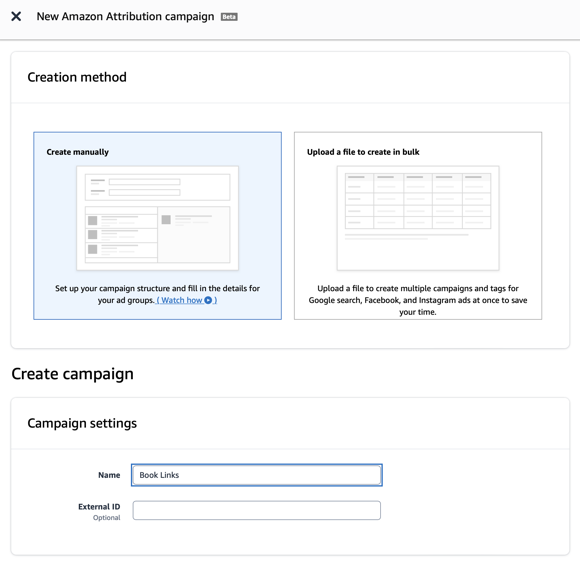
In the screenshot above, we’ve created a campaign named “Book Links” to represent the Attribution Links included in ebooks.
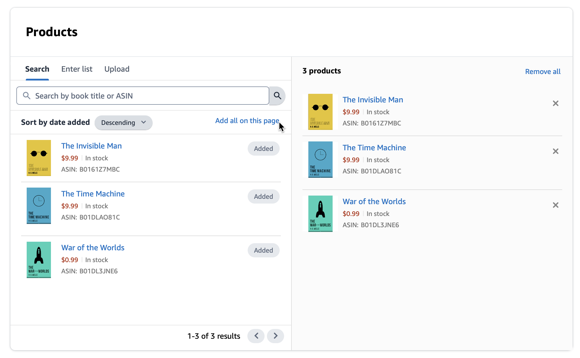
After you’ve named your campaign, scroll down to the Products section, where you’ll find all of the books listed at Amazon KDP. Click the Add all on this page link to add all of your titles to this campaign.
Scroll down further to create Ad Groups, the last step necessary to create your Attribution Links.
Creating Ad Groups
You’ll create an Ad Group for each title in your Bookshelf.
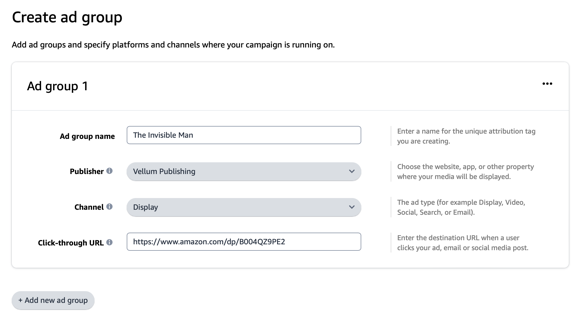
For the Ad group name, enter your book’s title. The Publisher menu will let you enter any text you like when you click on it.
The last thing you’ll need for an Ad Group is the Click-through URL. This is the URL for your book’s listing on Amazon. In another browser tab, find the listing for your book at Amazon, then use Copy and Paste to enter the URL here.
If you have multiple books in your catalog, press Add new ad group to create an ad group for the next book in the list, repeating until you’ve created an Ad Group for each of your books.
When you’re done creating Ad Groups, press the Create button in the upper-right corner of the page.
 This will create your campaign and all of the Ad Groups you configured.
Including Attribution Links in your Book
Once you’ve set up your Attribution links, you’re ready to include them in your book, like in an Also By page.
You can find the links to include in a table on the Attribution tags page:
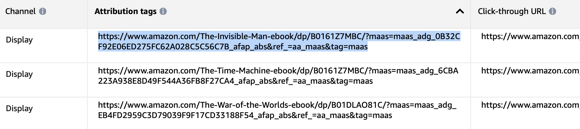
You’ll see an Attribution Link for each Ad Group that you’ve created. To use one in Vellum, copy the entire URL from the Attribution tags column and then paste it into the Kindle text field in a Store Link.

After you paste your link, Vellum will show an AA indicator to let you know that Amazon Attribution information will be included. You can use the arrow button next to the indicator to test that your link works correctly.
Tracking Clicks and Purchases
After you’ve updated your book, you’ll need to generate then upload a new version to KDP.
Once the new version of your book is available, you should start to see clicks and purchases in the Amazon Attribution console:Since these updated links will only appear in new versions of your books, it will take some time before you begin to see results. And it can take Amazon up to two days to process clicks, especially immediately after you create a campaign.
Reusing Links
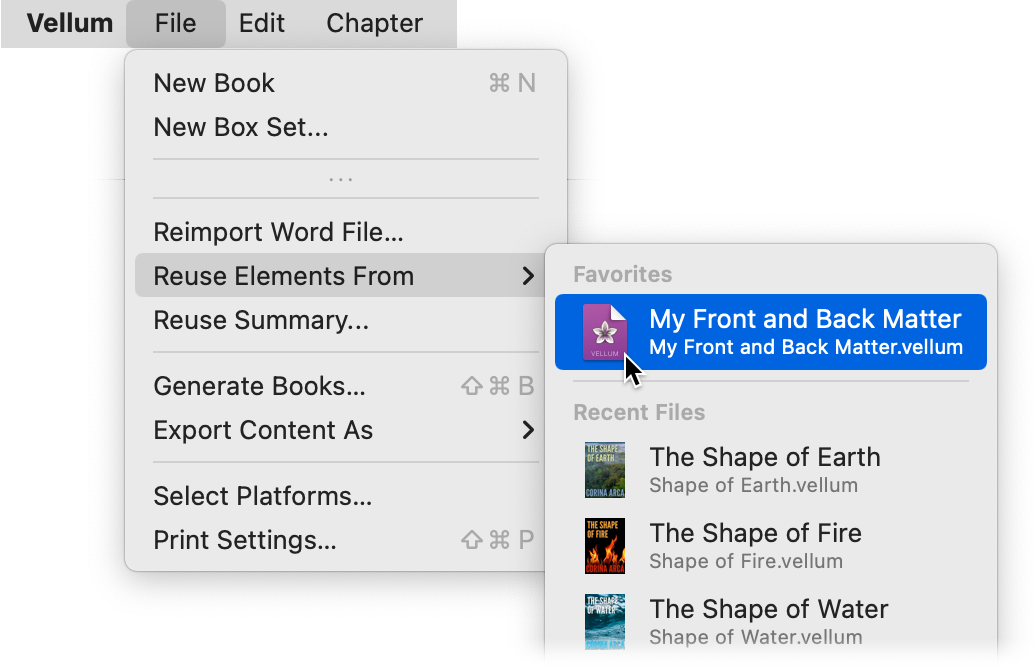
Setting up these links can be time-consuming. Once you’ve created a page of links, you can include it other books with File ▸ Reuse Elements From:
More details can be found in Reusing Elements.